I consider myself fairly prudent with my money, but that doesn’t stop me from every now and again buying an extremely niche product just for the fun of it. (If you are immune to this tendency let me know your secret.) Enter the Kolari IR Chrome filter.
It was a particularly costly splurge purchase. After purchasing a full-spectrum modified Pentax K-01 last year I was told about this unique infrared filter I might like. It sat in my watchlist for only a two months before I couldn’t resist any longer. Let me tell you about it.
What is the Kolari IR Chrome filter?
Most IR filters target cutting off varying levels of the visible light spectrum in a fairly linear pattern. 590nm, 720nm and 850nm being some of the most common. The numbers represent generally where the transmission cutoff is in the light spectrum. Everything north of the number is transferred, whereas everything south is blocked. This of course is an oversimplification, but you get the idea. Photographers then like to use these varying levels of visible and infrared spectrum mixed light to create certain visual effects. Either black and white images with bright foliage and dark skies, or false color images where the sky color is normalized and other colors end up looking out of this world.
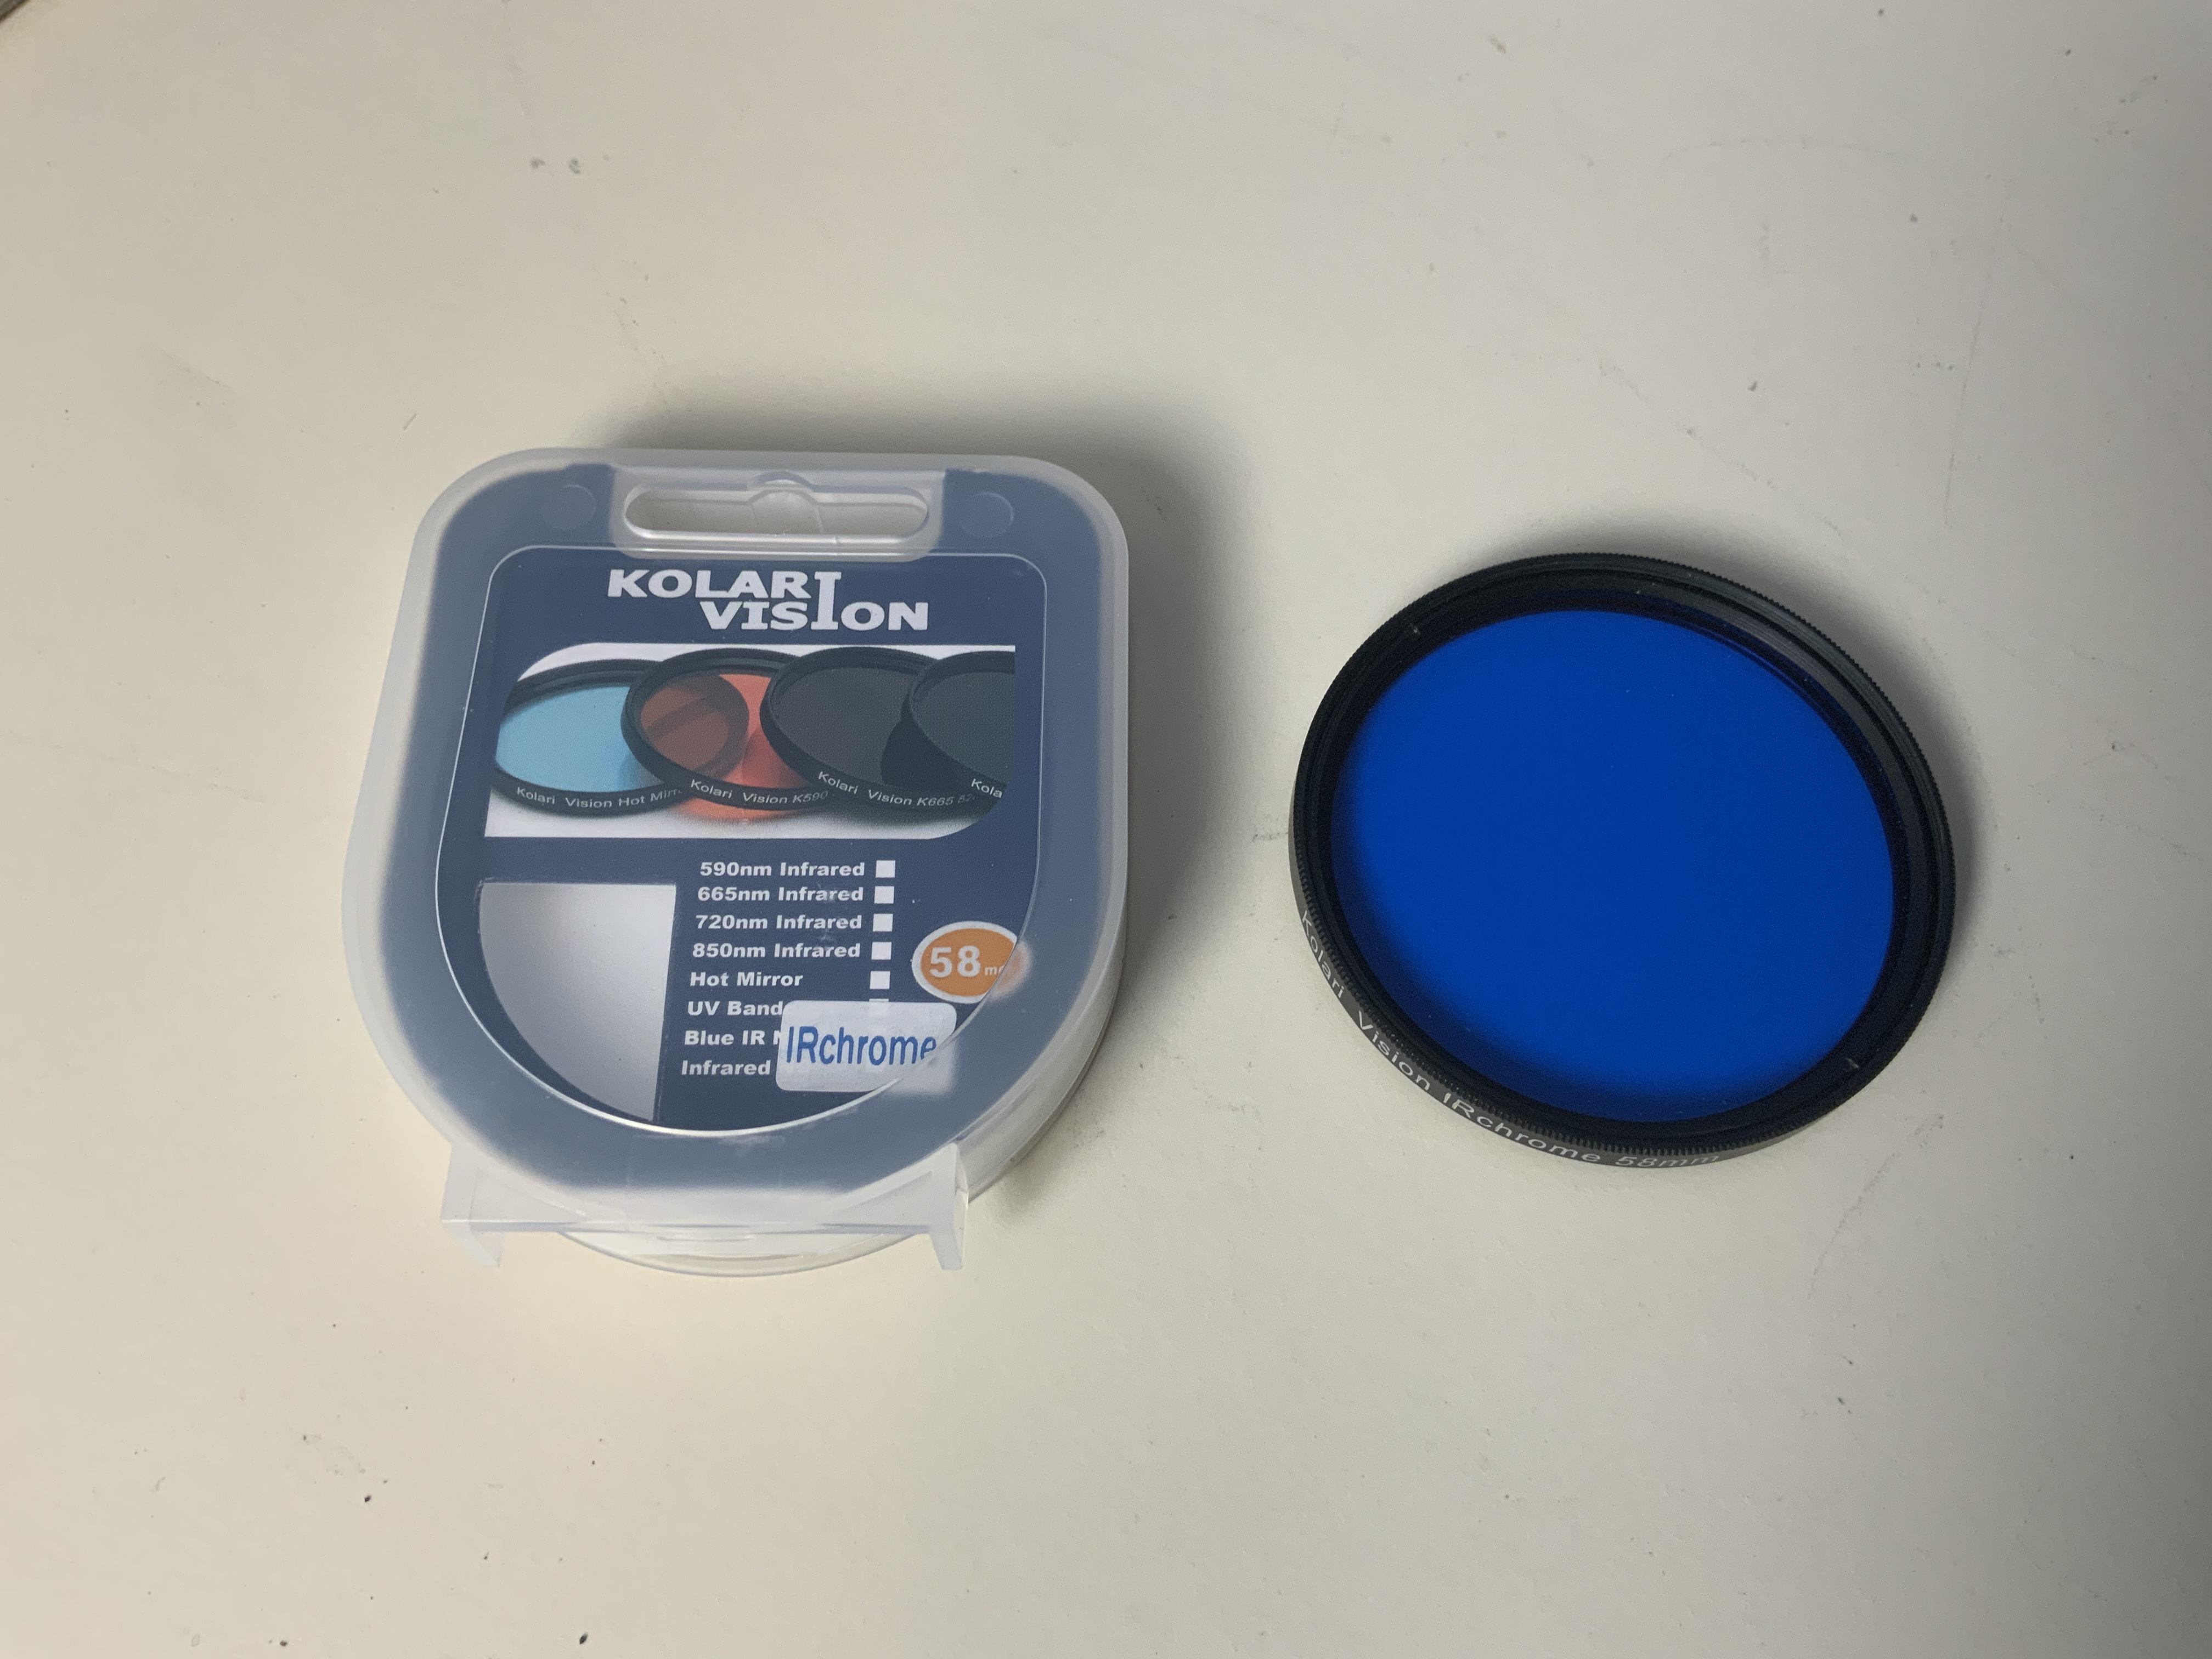
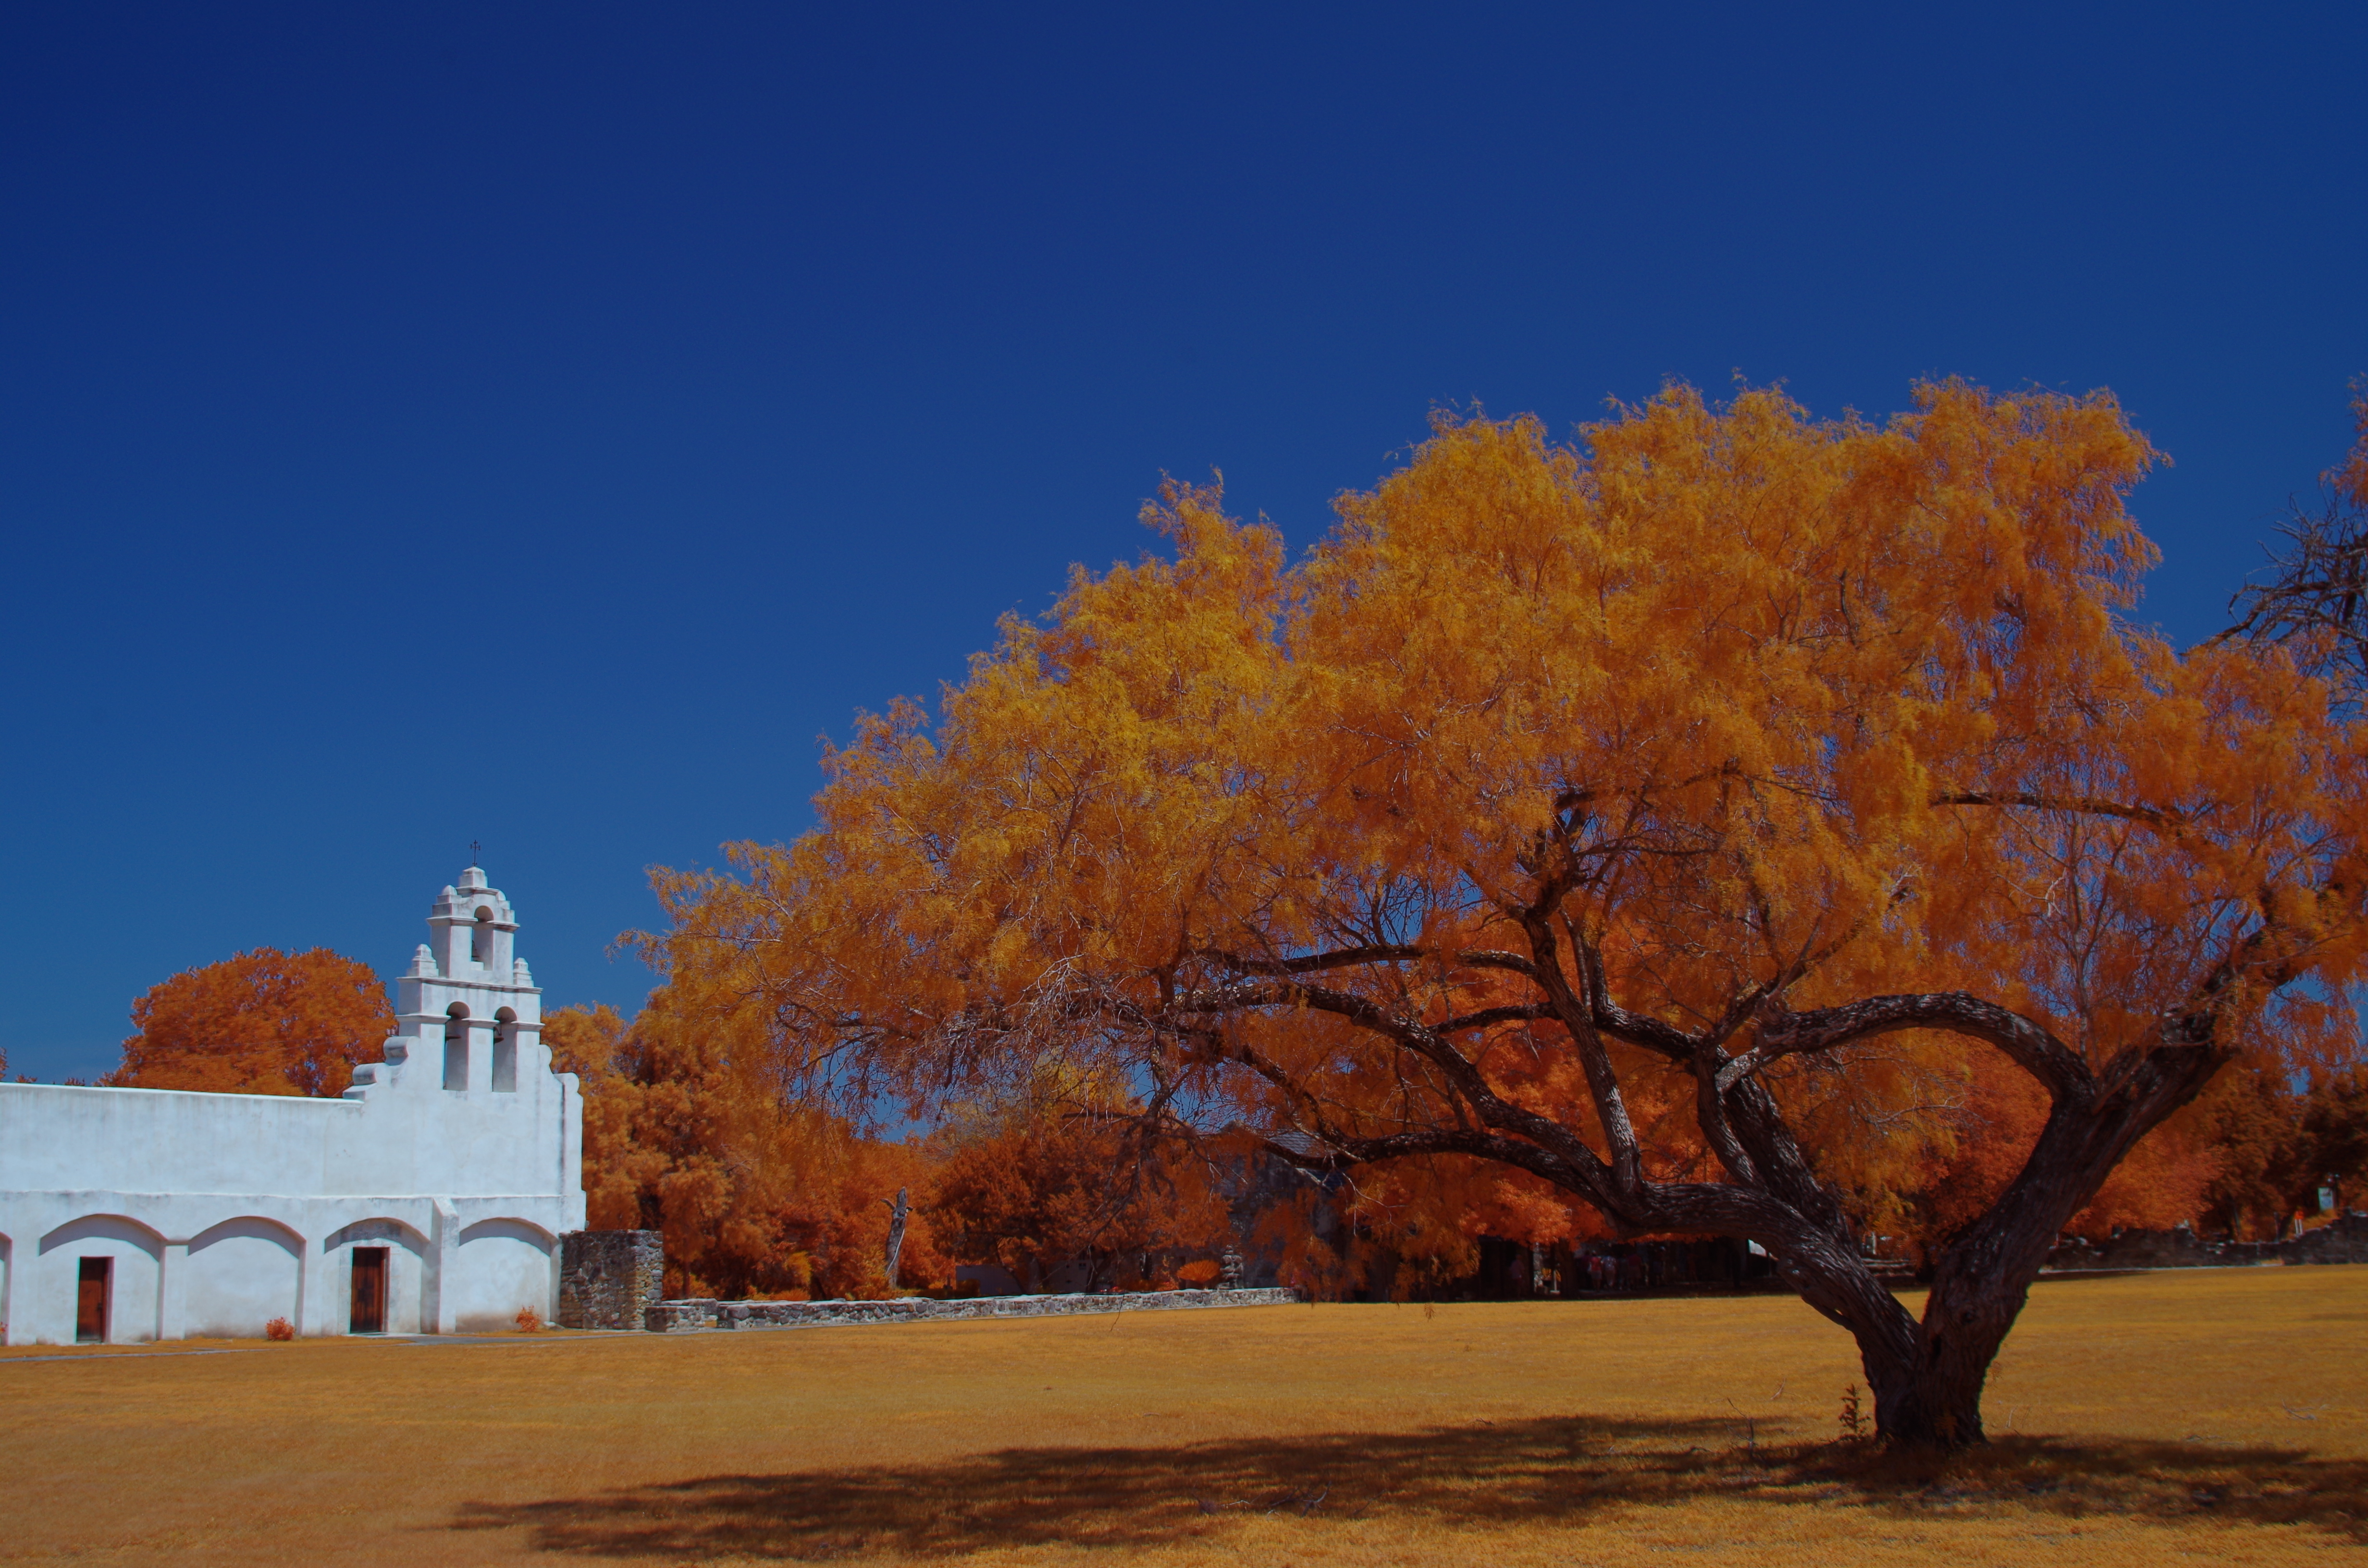
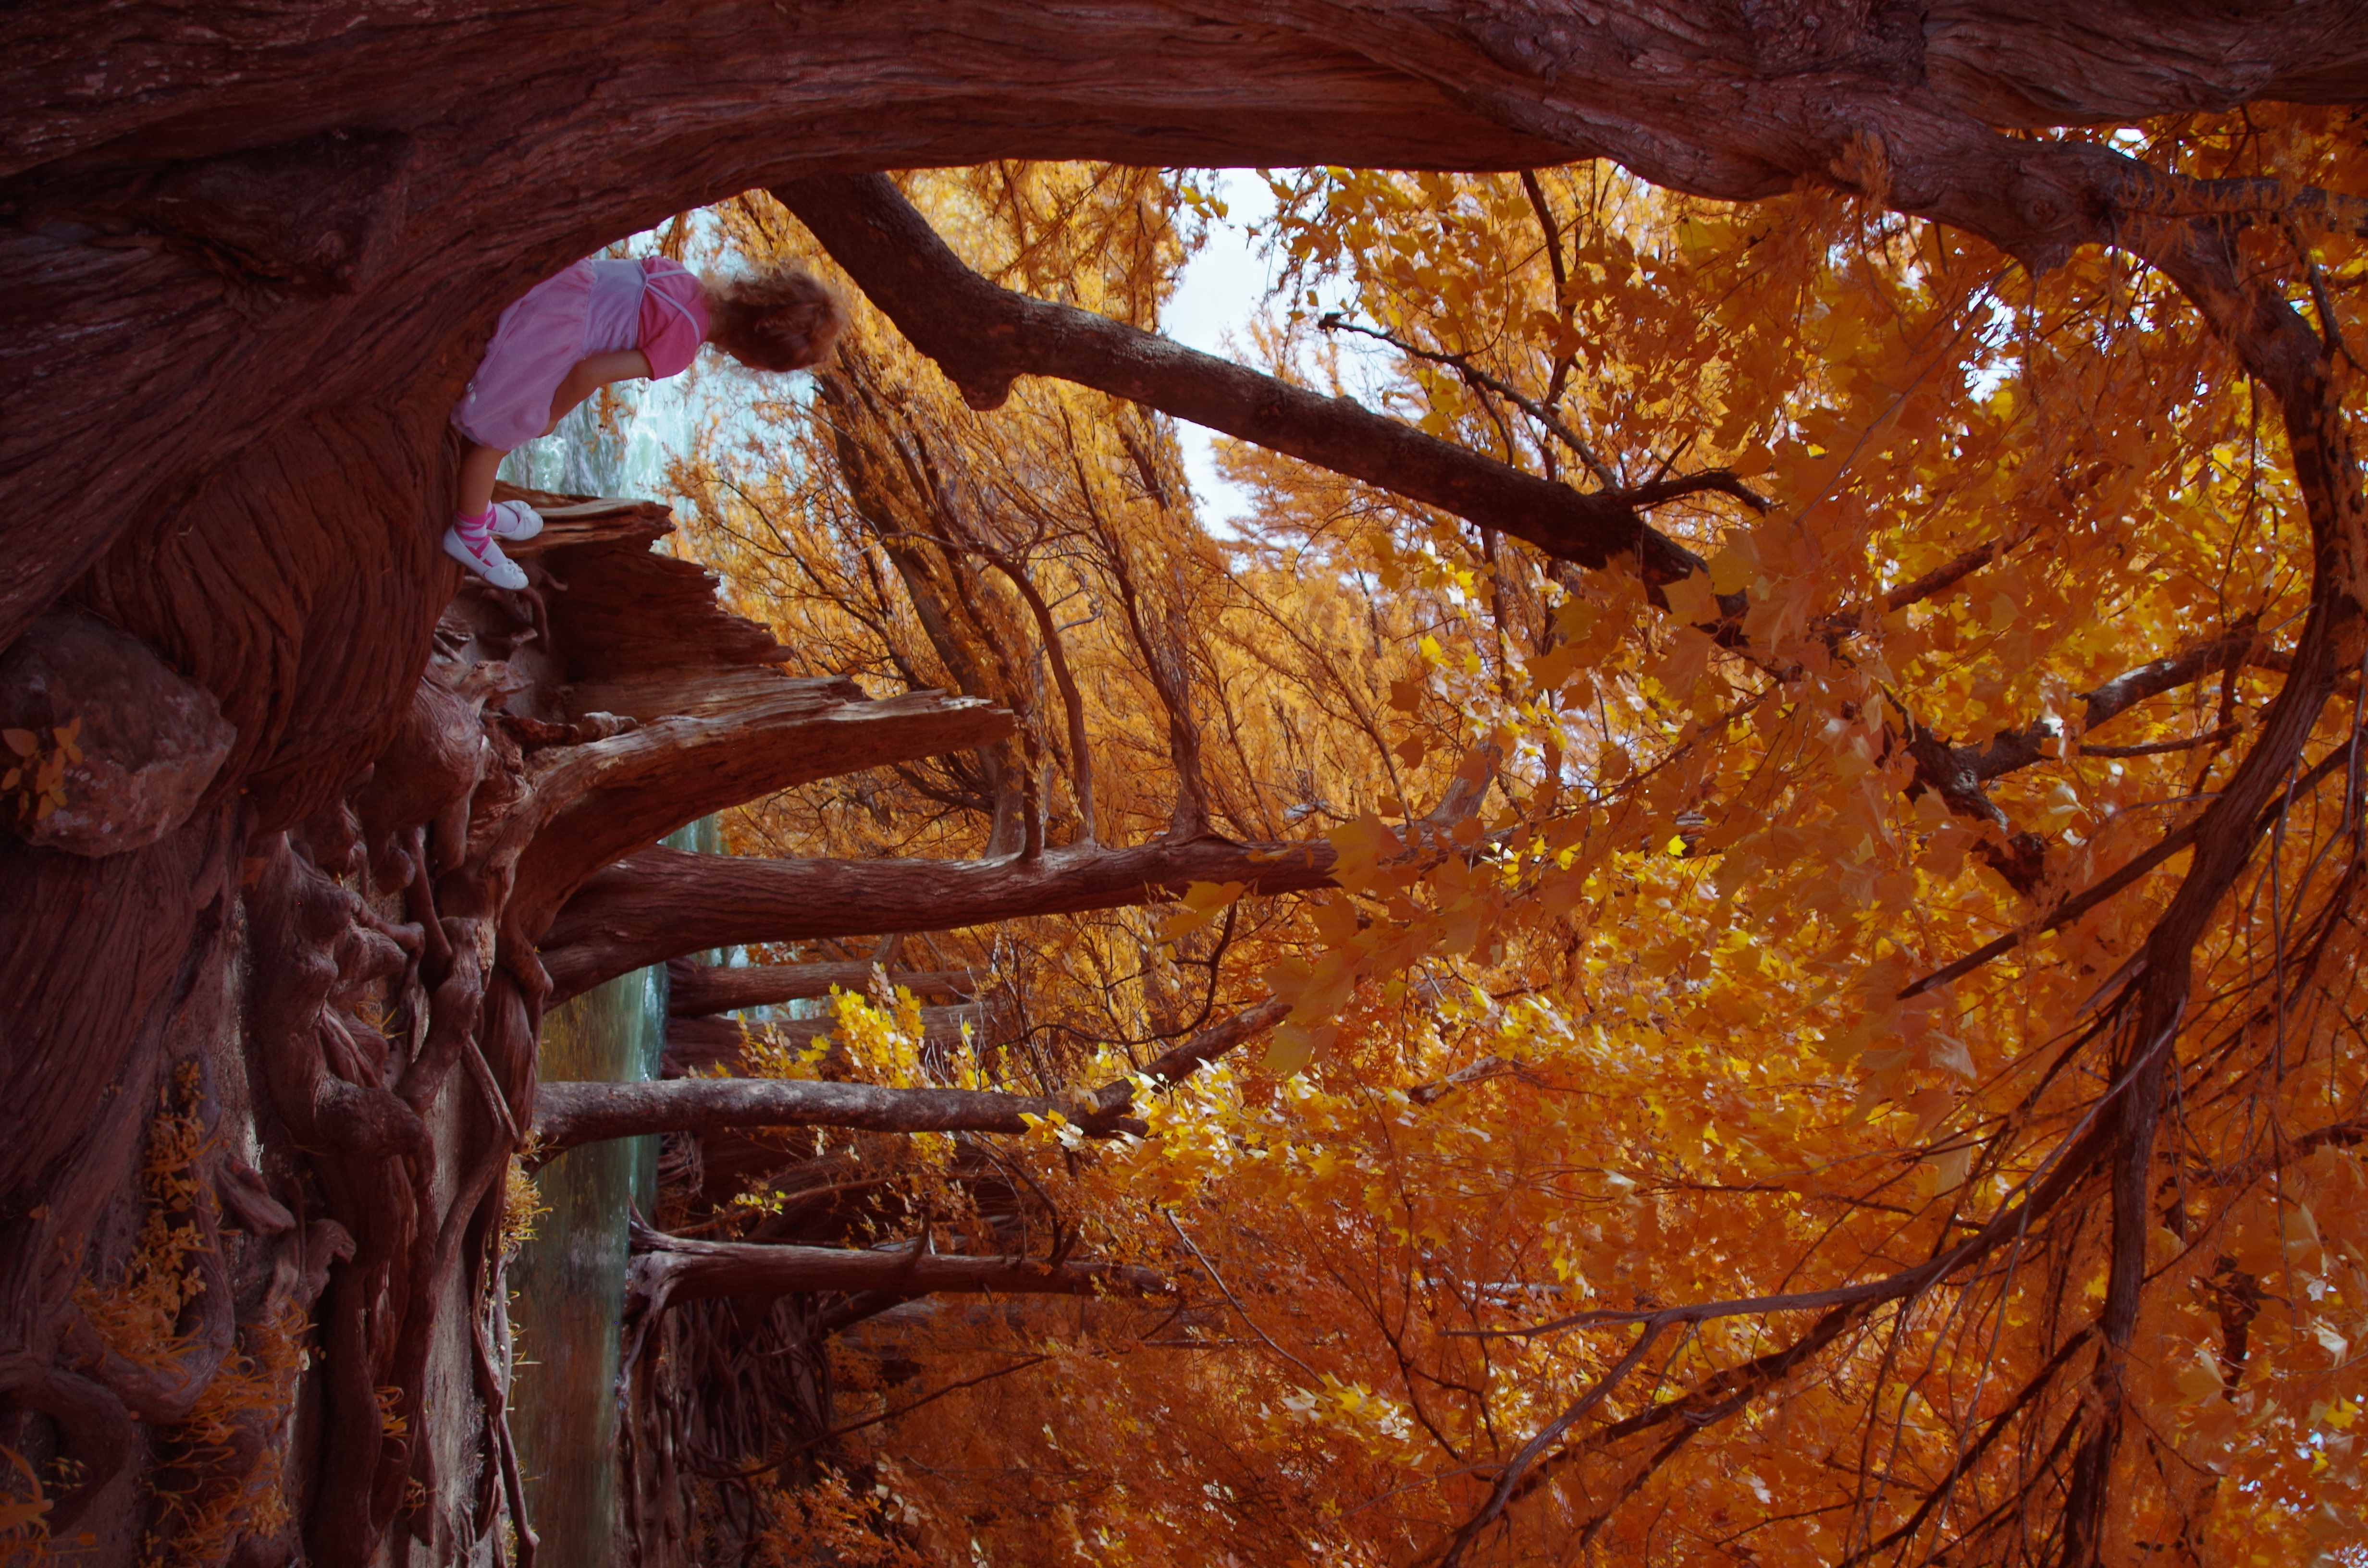
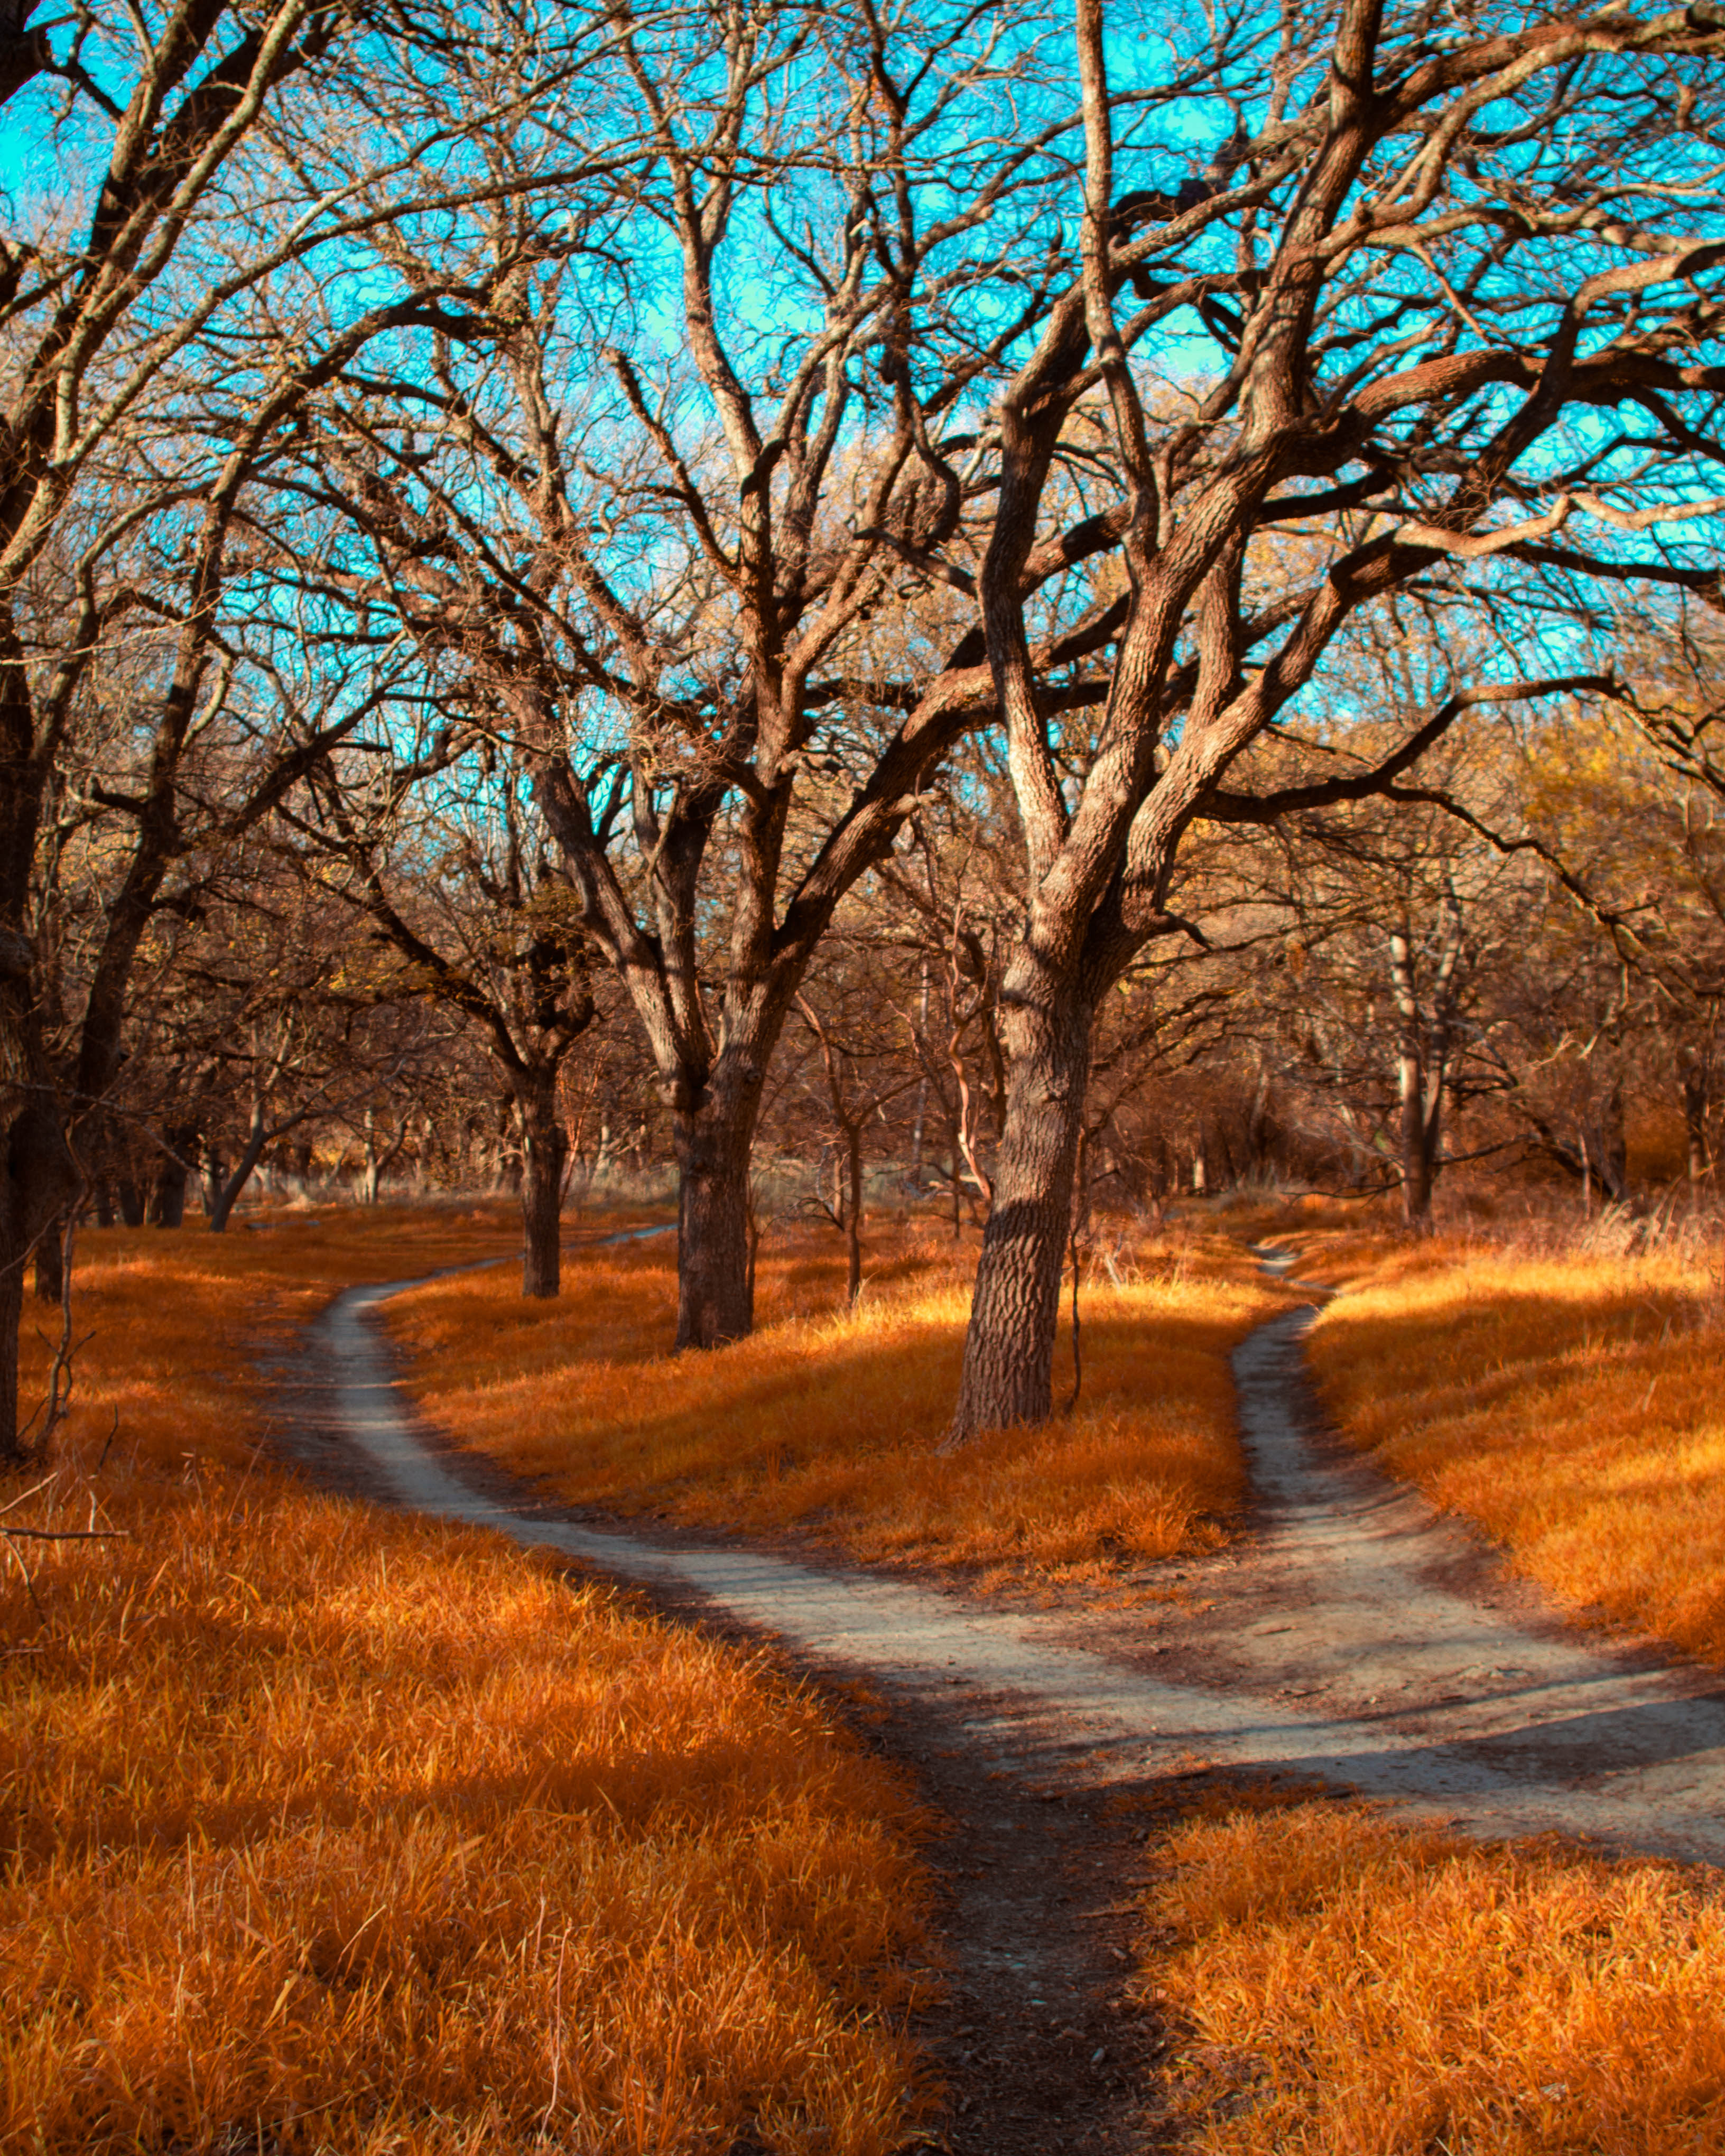
What makes the Kolari IR chrome filter unique is that it blocks an interesting mix of visible spectrum, keeping the skies a normal blue color while foliage turns a redish orange color. This is in attempt to mimic the look of an old infrared sensitive Kodak film stock, Aerochrome. I won’t spend time discussing Aerochrome and it’s history here. Much more detailed explanations and examples of this film can be found online and are worth checking out. What I will say here is that the look caught my attention. The fact that you could get the look in the live preview from a full-spectrum camera intrigued me even more.
Advantages of the filter versus post-processing
I did a little bit of research. About Kolari’s history making the IR chrome filter, the history of Kodak’s Aerochrome film, and how to achieve the Aerochrome look without the filter. That’s right. I could have avoided buying a $100 filter and just done all my editing in post to achieve the Aerochrome look. And many photographers do. While a competing infrared conversion company downplays it, there are some disadvtanges to this approach. The biggest is the fringing caused by drastically editing hues. This does not mean you shouldn’t try to do it. In fact, if you have a converted camera I encourage it. It is extremely fun and satisfying, just like all infrared photography has been for me. But if you really want that look without the fringing issues, carry on.
Another advantage of using the IR Chrome filter is the ability to preview the image in the camera, with the correct colors. Infrared photographers are used to using their imagination as post-processing will often yield a drastically different result at least color wise. But still, it’s nice to see the colors for once as they would appear and adjust the image in the moment.
How to get the most out of the Kolari IR Chrome filter
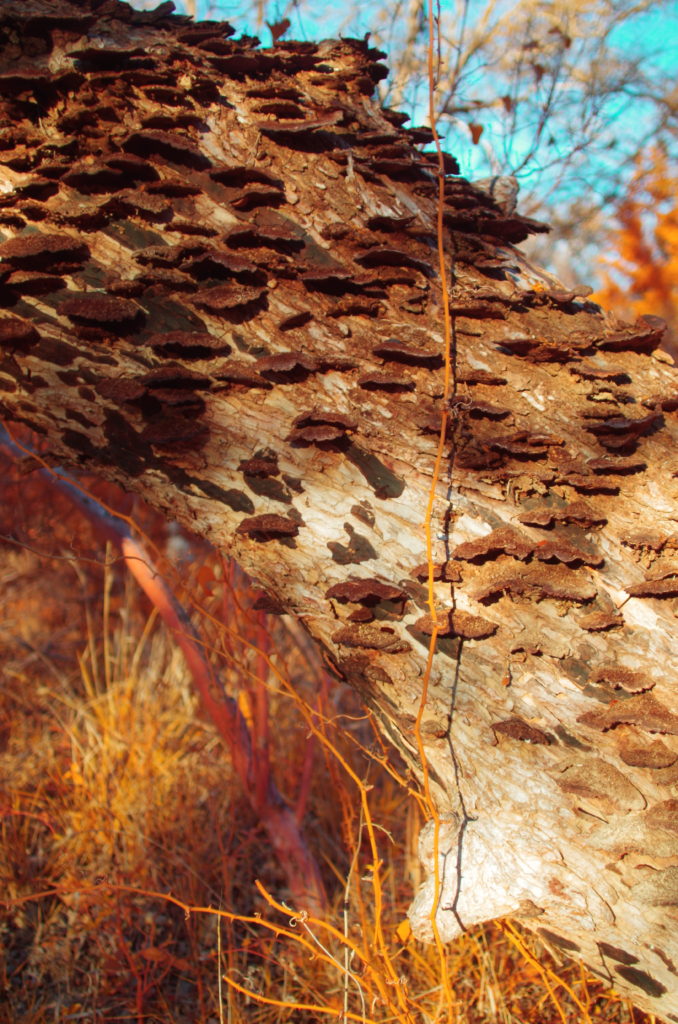
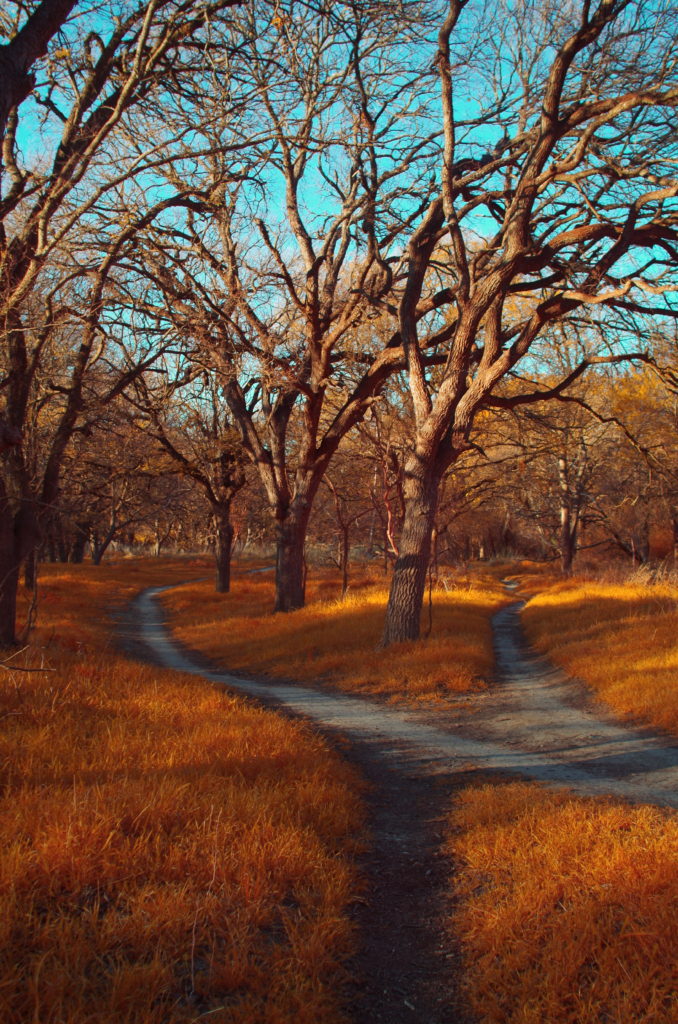
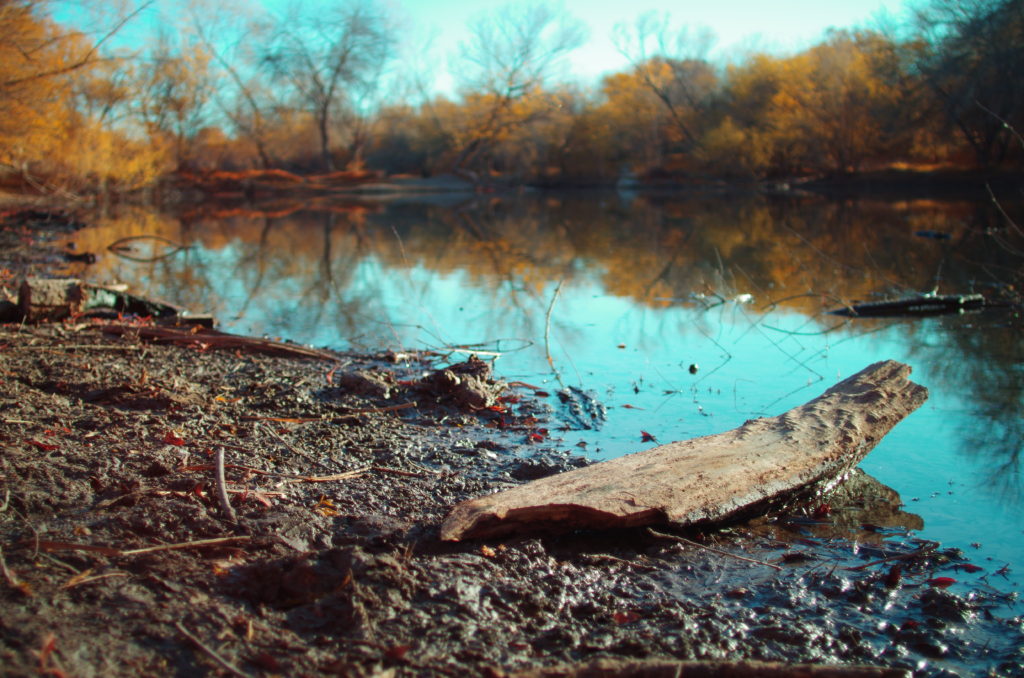
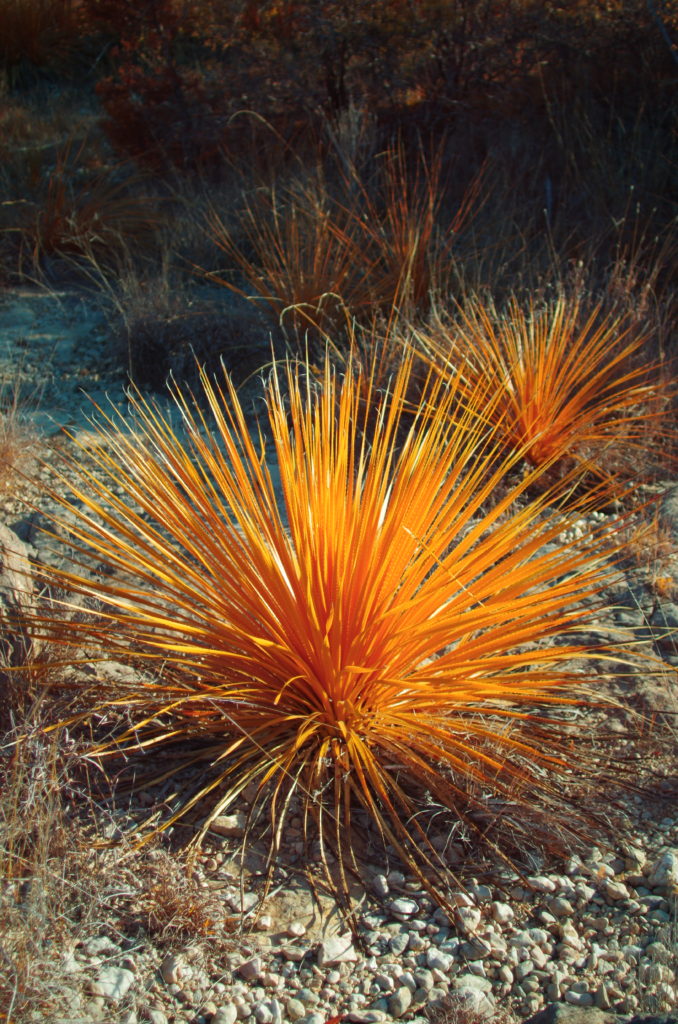
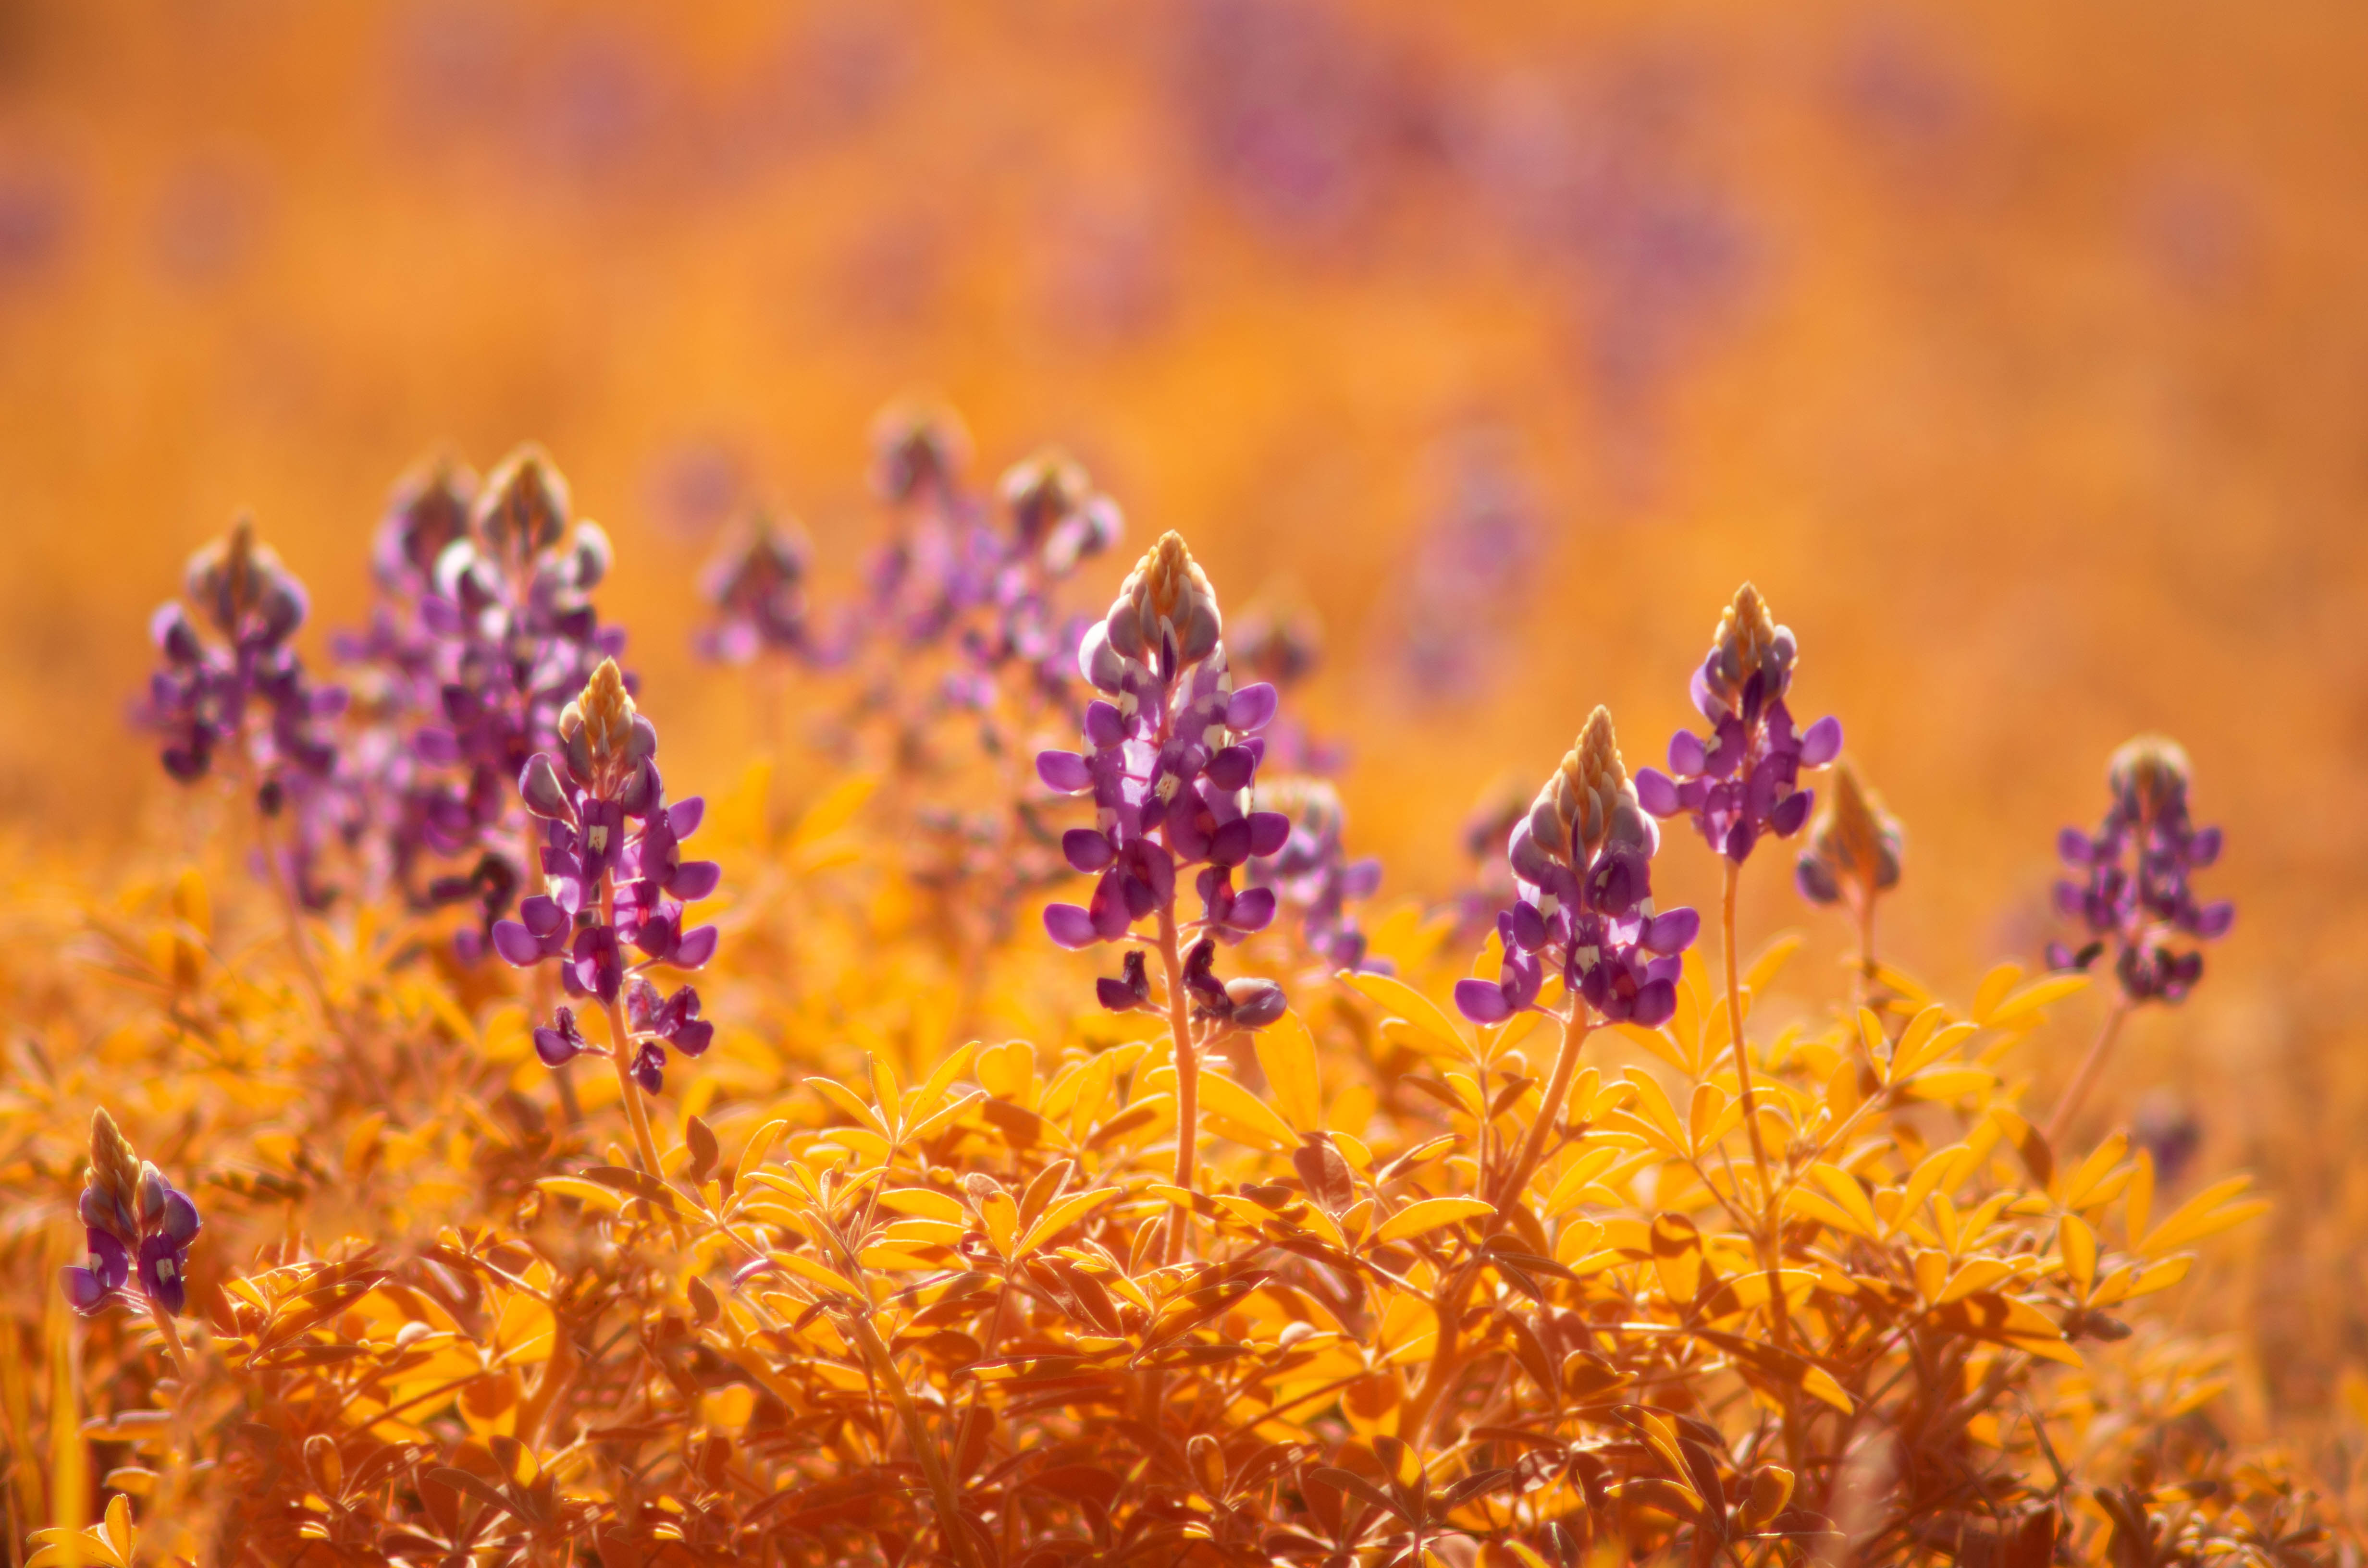
Kolari’s website shows example images taken with the IR chrome filter with deep reds and vibrant blues. I could not replicate this look straight from the camera, and from what I’ve seen online most people can’t either. Foliage appears more orangey than red, and the sky more torqouise than blue. Kolari does have a few suggestions though for optimizing the look. The first is to play with the white balance to get it dialed in. The second is to adjust the hues in the cameras jpeg profile settings to lean more red. This will work, but going too far will mess with the image quality much like pushing it in post will. Kolari mentions that different sensors react differently with the filters as well, calling out Sony specifically as leaning more yellow. Perhaps Pentax is the same way, and that’s why I am getting the look I am.
My IR Chrome tips
After playing with the filter a bunch I have my own set of tips built off the ones recommended already.
- Set the white balance on something off white. This I am still experimenting with on every location. Usually something like pavement works best for me (grey), but others have reported white balancing on foliage or something light blue to give a different look.
- Use a polarizing filter to darken the sky. FYI, because of the thickness of the IR chrome filter you cannot accommodate a filter on top of it, so instead you must put it at the top of the stack.
- Adjusting the hue in the JPEG profile setting a little does help. Shift the oranges closer to reds a little bit to get a deeper red.
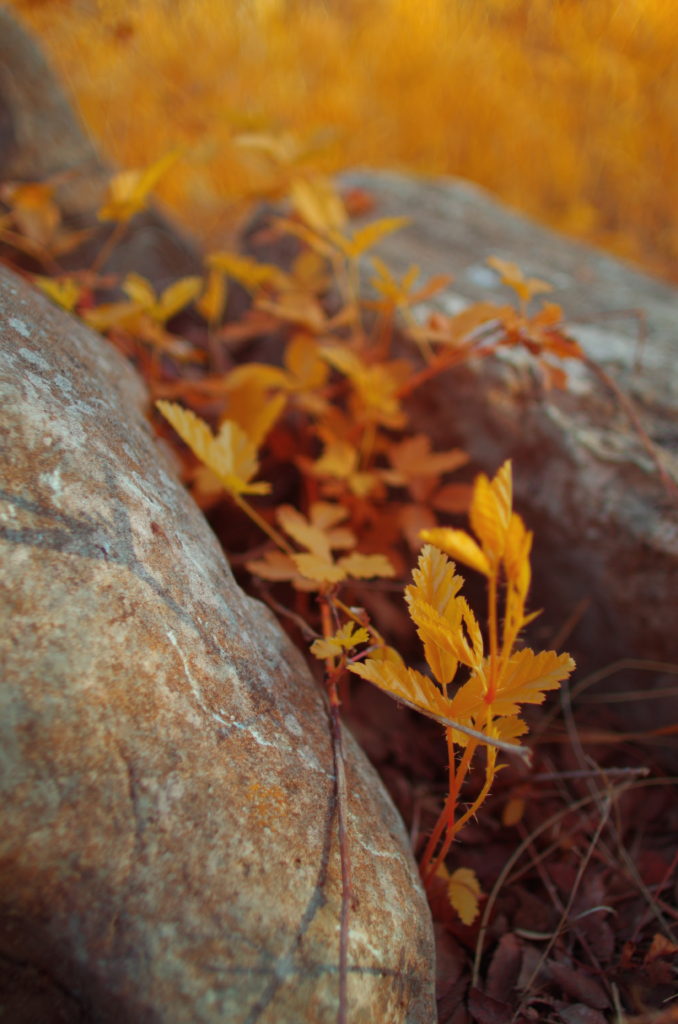
- The greener the foliage, the redder it will be. If you are shooting in a season where the foliage is only lightly green, it generally will not be reflecting enough IR to get those deep reds out of the camera. Different plants will give off more or less IR too, and in turn affect the color. That’s generally true with all IR photography, but it does make a big difference here.
These tips have gotten me much closer to the deep reds and deep blue skies, but still not completely there. To really get the advertised look I must make final tweaks in post. There’s two ways you could look at this. One would be that if you’re buying this filter to get the advertised look without any post processing at all, that might not be possible. Once again, maybe this is because of my sensor and processor, and maybe something like a Canon that Kolari used in their testing would work better. But the second way you can look at it is to accept the more orangey reds and teal skies as a different look, one equally unique and totally possible straight out of the camera. In this way, the Kolari IR Chrome filter completely delivers.
Final thoughts
The Kolari IR Chrome filter is an incredible piece of optical engineering. Whether or not it’s worth the high price tag is up to you. I would suggest following tutorials to use post processing to mimic to aerochrome look first. While the filter offers some important advantages over that approach, you can get a final result that looks almost identical without having to buy the filter. All that being said, I find the IR Chrome filter to be more or less what it advertised. You can look through the viewfinder and see what may be exactly the final image you want. I found some images where I did no tweaking at all just to prove a point (and justify the expensive filter).
Looking to pick up some used camera gear? UsedPhotoGear (by Roberts Camera) is my favorite resource. Great prices, good selection, and a 180 day warranty. Purchasing through this link helps support me: Get 5% off total order on UsedPhotoPro